
Next, we have a section called Robot, This section contains details of the In-action and Log History, Published Robots, and Scheduled robots.
As soon as you click on the Robot, the below page will open, which is as below:
- We have three sections under the robots respectively, In Action and Log History, Published Robots, and Schedule.
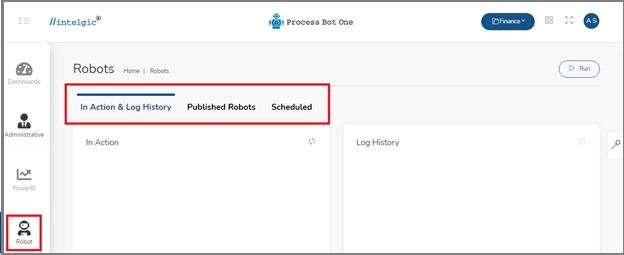
- In Action and Log history: It will display the history of the robots, like whether the robot is paused or running, or completed.
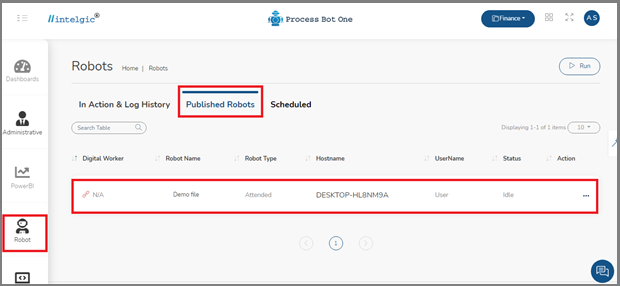
- Published Robots: It will display the list of published robots and details of each published robot.
- The details of the published robot include the following:
- Digital Worker: Digital Workers are virtual professionals who use AI, machine learning, RPA, and analytics to automate corporate operations from start to finish, enhancing and boosting human work.
- Robot Name: It will display the name of the robot
- Robot Type: It refers to the type of the robot, whether it is an attended or unattended robot.
- Hostname: It will display the name of the device/computer to which the Process Bot One has connected.
- User Name: Refers to the name of the user of the device/computer.
- Status: It refers to the relative level of the robot.
- Action: It represents the actions related to the published robots.
- Scheduled: You can schedule the robot when to trigger concerning Time, week, or Month.
- The schedule section will be as shown below:
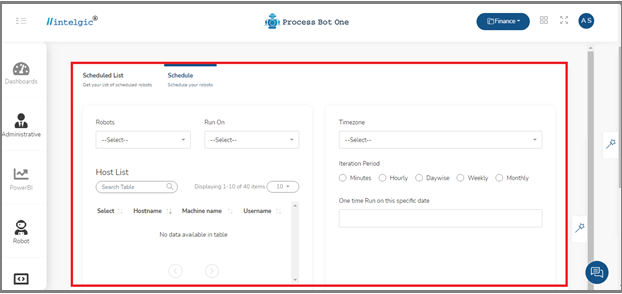
- Robots: The robot drop-down provides you the option to select the name of the robot, which you want to run.
- Run On: The run-on drop-down provides you the option to select the host either from Default or Specific.
- Time Zone: By clicking on the time zone you can select the time zone according to your location and then set the time according to your preference.
- Now, to run robots, the first step is, go to the published robots under Robot, you can see the list of published robots which is as shown.
- We can run the robot either by clicking on the Run under the Action or by clicking on the Run button on the top.
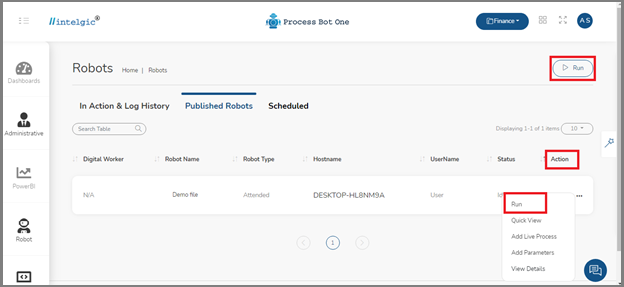
- If you click on the run which is under Action, then the robot will be launched under the default host machine.
- If you have a big network and multiple hosts( ex: Host1, Host2, Host3..etc….) then the robot will be launched under the default host(Host1).
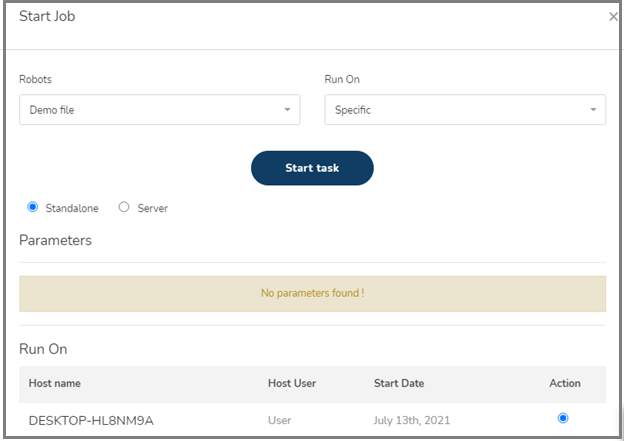
- Once you click on the Run Button, a Start-Job pop-up window will appear, which is as shown below.
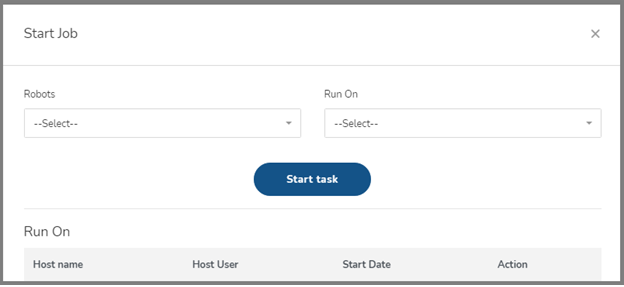
- Enter the required details and click on the Start task.
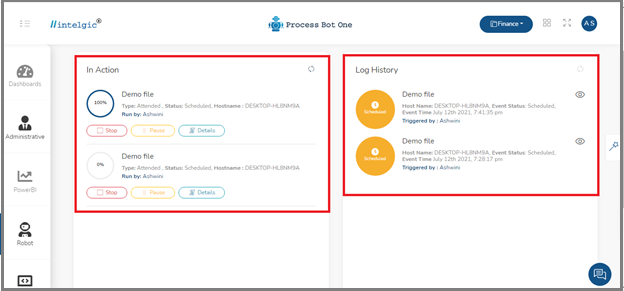
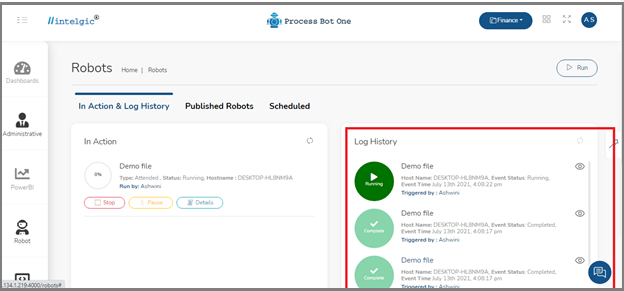
- Once we click on the start task, the robot will start running, if you go to In Action and Log History, you will find the Action which is going on and how much has been completed.
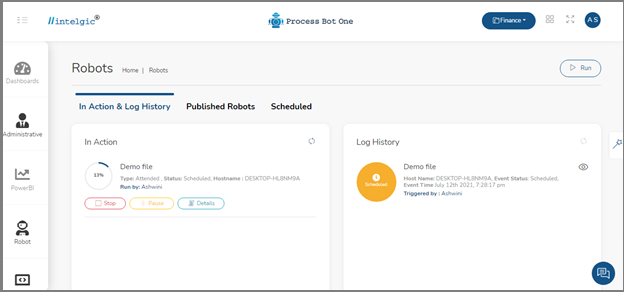
- You can see three options in the In Action section, If you want, you can Stop the Robot or, Pause the running action.
- Once you Pause you can Resume the action by clicking on the Resume
- In the Log History, you can see the relevant details of the robot as shown below.
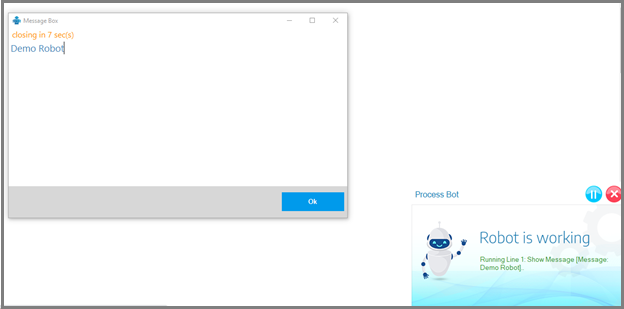
- Once the robot has been run successfully, just open the Process Bot DWmaker, the text message which is present in the file will be displayed in the Message box pop-up window as shown below.
- If you check again in the Action and Log history, you can see that the task has been completed.
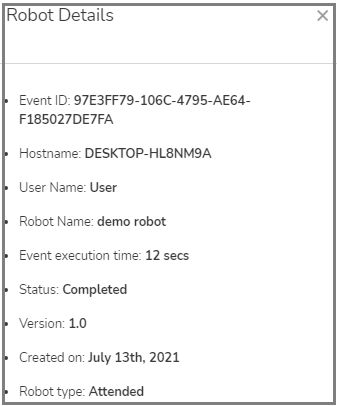
- If you click on the eye symbol in the Log History, you will get all the details regarding your published robot.
- The schedule section will be as shown below:
- The details of the published robot include the following: